Tuesday, January 7, 2014

How to start seedlings

Ever wonder the best way to start seeds and have them actually germinate? I sure have! So, I did some research, and have put down a few of (I feel) the most useful tips for starting seeds! Since spring is coming (eventually!), it seems a good time to get the info out there!
See – the thing is – the growing season just isn’t long enough. Especially if you live somewhere like Idaho, where we get freezes at night sometimes up until the end of May! So, it’s a great idea to grow your seeds inside, where it’s nice and warm, and then transplant them outside to fruit. Plus, starting your seeds inside sounds much more complicated than it really is.
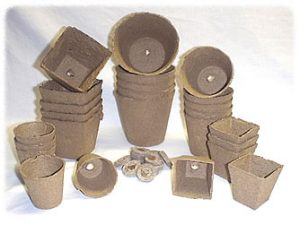
The first thing – make sure you have everything you need. You need containers of some sort; you can use Solo cups with small holes poked in the bottom for drainage, peat pots, paper pots, soil blocks, or you can use plastic trays you pick up at the garden center of any hardware store. The nice thing about the peat, paper, and soil blocks are you can just plant them right in the ground. However, they aren’t reusable. The plastic ones are reusable, but you have to remove them from the plant, and if you aren’t careful, you can damage the roots. However – I wouldn’t stress too much about this – it’s not rocket science. Just be gentle. :)
peat pots
Also – you need some sort of growing medium. Now – there are about, oh . . . one billion different options here. Honestly – pick one. You can use coconut core, good ol’ dirt from the garden, potting mix, and multiple other options, or some combination of all of them. We have a great potting mix for your seedlings here. Better yet, use your Soil Cut Starter Pack, and get a premixed fertilizer-enhanced version of our potting mix!
When do you start seeds? Well, that sort of depends. You want to check the seed packet and see the time until germination and plant accordingly. You don’t want plants ready to go when it’s still freezing outside at night –trust me. That’s not fun. So it varies according to plant. One thing to remember – plants like room to spread out – so make sure you don’t keep them in too small a container for long. Start them small – but when they start growing – move them.
Once your seeds are planted, you want to keep them warm and humid. They’ll germinate best this way. (While you are waiting for them to germinate, make sure you mist them with water frequently (don’t drown them though!)), and keep them in a warm place – somewhere between 70-80  Fahrenheit. Once you see sprouting, remove any plastic covering you might have on your plants – you don’t want them to get a disease from being over-watered. Let them dry out just a bit between waterings at this point. Also – make sure you label your containers!!! It’s really easy to forget what is where!
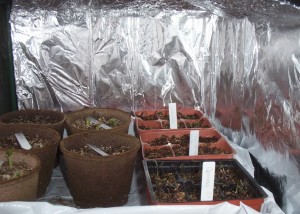
Make sure they get plenty of light once they sprout – light tells plants a lot, and they depend on it to know if it’s time to grow, hibernate, bloom, etc. So make sure they are in a South-facing window if you can, and they get a lot of direct sunlight. Also – you can increase the amount of light they get with aluminum foil – cover some cardboard with it and prop it behind your seedlings so the light from the window reflects off it and bounces back on them.
foil 3 greenhouse
Once they are big enough, you can start to take your plants outside a bit during the day – this is known as “hardening off”. Basically, you expose them to the outside weather a bit at a time so they don’t go into shock when you move them outside. Make sure you don’t forget them overnight though – this, also, is not fun. You can also use some plastic sheeting to give them a bit of a greenhouse effect while they are out for the first little while. Do this over at least three days, and they should be alright as long as the nights aren’t too cold to survive. In Idaho, we wait until it’s been a couple weeks since the last frost before we plant anything in the ground. There just always seems to be a surprise frost if we don’t.
Fertilizing: add in a little Kelp and some Grow Pack, and you’ll be in great shape!!! Make sure, though, you aren’t using full strength in your seedlings. They aren’t tough enough yet to handle a full dose. Use our recommended dose cut in half, and they’ll be fine. See! Easy breezy! ;)

Monday, December 30, 2013

New Stuff!!! And just in time for New Year's! Wooot!

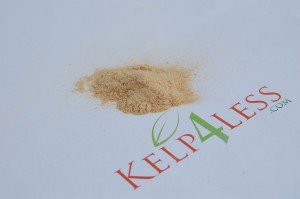
We came out with something new and awesome!!! Again. Yup. Aside from all the other awesome products we have, we’ve decided to unleash . . . (drumroll please) Enzyme Powder. Ahhhhhh yeah.
Soluble Enzyme Powder
So – Benefits!!! Well, our Enzyme Powder is just as effective as other enzyme growth boosters! But, of course, being Kelp4Less, we’ve figured out how to make it WAY less expensive!!! Similar products cost about $32.00 per liter!!! Holy Crow! Ours is only $13.39 for an ounce of powder! So – you mix 1/8 of a teaspoon in 5 GALLONS. Which means the cost of our product is only $1.67 per teaspoon. Now, you only need to use 1/8 of a teaspoon for every 5 gallon batch (by the way – we have 8 teaspoons in an ounce – roughly,) which means the cost per 5 gallon batch is only 20¢. MEANING, the cost per gallon of our product is only (wait for it): 4¢. Yup. It’s INSANE not to get our Enzyme Powder, just by cost alone!!!  Now – you can pay 4¢ per GALLON, or $32.00 per liter – let’s hear it folks: “Paying for Water Sucks!!!”.
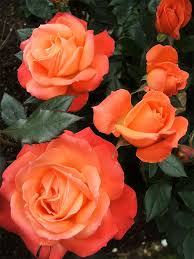
Okay, we’ve established it’s WAY more cost effective to purchase your Enzyme Powder through us – naturally. But what is the POINT of using Enzyme Powder, anyway? Well – Enzyme Powder is great for keeping your roots clean – meaning you’ll avoid that nasty, slimy brown root problem that happens so often in Hydro systems. Enzyme Powder applied to the roots will help out with bud formations on your roses, and any other plants which produce buds.
roses
Enzyme powder is a great addition to your compost, as well! As the Enzyme Powder works, it naturally converts compost material into beneficial, plant-accessible food! Also – ladybugs will use the Enzyme Powder as protein – fuel – to keep eating those aphids!!!
In short (kinda, lol) – our product is, as always, as good as or better than the competitor! And, we’ll provide it to you at a FRACTION of the cost!

Tuesday, November 12, 2013

Need therapy? Naaaaaaaaaaah, you just need to garden!

So, anyone who has ever had “that moment” in a garden knows why gardening is therapeutic. But for someone new to the gardening culture, or someone who just has an interest in gardening, it seems a little . . . well . . . odd. Gardening as therapy? Why? Well, there’s a certain moment, in the garden, when you’re all alone, and you catch a whiff of compost, and look over your garden, and you just feel . . . satisfied.
Gardening has long been recognized as therapeutic, and calming, to say the least. But, there are actual quantifiable benefits to gardening, too. Not just the feeling of well-being. Which, for most gardeners is enough, but still! I have a blog post to write, people! lol!
Benefit #1: One hour of consistent gardening (weeding, mulching, digging, pulling, wheeling in the ‘barrow, etc) is the equivalent of 10,000 steps or walking about 5 miles! So it’s good exercise! Awww yeah! Gardening combines coordination, balance, and strength training to give you a really good, well-rounded workout.
Benefit #2: There has been quite a bit of research done in the field of Horticultural Therapy (I love that there is a field researching this). There are many people who are recovering from illnesses and they do the majority of this recovery in a garden. Being in nature and in touch with nature has the effect of reducing tension, stress, muscle tension, and even blood pressure!
*Tip! Skip the power tools! Use manual tools like rakes, clippers, lawnmowers, and trimmers. They are harder to use, but as a benefit, they are usually less expensive than their powered counterparts.
Benefit #3: There has been some research to suggest gardening helps your mental health in more than just recovery. Some studies show gardening has been linked to a reduced risk of Alzheimer’s Disease. How cool is that?! In patients who already have Alzheimer’s,  According to Cath Burley, a consultant from North West Anglia Healthcare Trust was quoted as saying, “Being involved in something constructive and creative, like a garden, can help. Gardening may help slow the loss of short-term memory, one of the first facilities to be lost in Alzheimer’s disease. Skills that are learned and practiced can be retained despite the decline in overall brain function that occurs in the later stages of dementia.” Also, it can give those with this serious illness hope – which is incredibly important.
Benefit #4: There is also significant research suggesting gardening helps ward off Osteoporosis (because it more closely mimics weight-training than cardio, which builds bone strength), as well as Diabetes (because of the physical activity – a significant preventative measure against Diabetes).
Benefit #5: PRODUCE!!! You have fresh, healthy food available to you, which is going to significantly increase the chance you’ll eat it.
Benefit #6: Along the same lines as Benefit 2, the field of Horticultural Therapy has discovered gardening helps calm those with dementia and anxiety, leading to better sleep patterns and better quality of sleep. Who doesn’t want that?
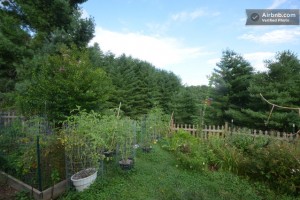
Garden
So there you have it. Gardening is good for you! But you don’t have to take my word for it . . . (hah!) Here are a few recommended reads:

Wednesday, October 9, 2013

Nighty-night!!! How to put your garden to bed for the winter!

Well, it’s that time. Seems like it flew, huh? But, winter is very close at hand, and it’s so important to put your garden to bed properly for the year. Otherwise, you wind up with a soggy mess to work with next spring. At least, you’ll wind up with one if you live in an area where it snows or rains most of the winter months. However, I’m a firm believer that cleaning up the garden is healthy, and motivational, at least twice a year. So regardless of where you live, it’s a good idea to do maintenance anyway.
So, on that note – here we go! For the record – The Old Farmer’s Almanac is a great resource (www.almanac.com), and where most of my research came from, aside from personal experience. :)
1. Before the first freeze (a frost can usually be survived by simple cover – a freeze is not quite so forgiving), or as soon as you know it’s coming, pull as much produce as you can from your garden. Now – don’t do it before the first frost – you’ll be jumping the gun! If you live in a northern area, we tend to get a real good week or two of frost at nights, then some nice Indian Summer weeks before it freezes for good. This is a great time to harvest more food! But once that freeze hits, you’re not going to see any more ripening. That’s it. Curtains. Game over. Uhhh . . . can’t think of any more analogies now, but you get the point, lol.
fall harvest
A beautiful fall harvest
2. Weed. Sorry. I hate this step, too. Gotta be done. However, it’s nice because you can see up-close where there are any insects or diseased plants you need to pull. While you’re at it, go ahead and just pull your annuals. Use them for compost as long as they aren’t diseased, but don’t throw the weeds in the compost!!!
3. Leave your tubers. Carrots, garlic, horseradish, radishes, turnips, leeks, and parsnips all stay good into the winter. Do, however, cover them with a thick layer of mulch as protection.
4. Till or turn over the soil. Add as much compost and mulch as you can. This does double duty – the compost will continue to break down over the winter, albeit slowly. Also, the mulch/compost layer protects the soil from the bitter winds that accompany winter. It certainly wouldn’t be a bad plan to add some nutrients in with your compost/mulch layer, too. Kelp would be a great bet.
5. Sit back and relax. You’re done out there for the winter. You can begin an indoor crop for fun, if you like, or you can start looking at canning/preserving recipes, like I do!

Tuesday, October 1, 2013

What is nutrient lockout and how can I fix it?

Ahhhhh, nutrient lockout. Even worse than losing your keys, (sorry lol) nutrient lockout is when your plants are not absorbing any of the nutrients in your soil. The sad part of this particular issue is – well – adding nutrients won’t help. The plants aren’t taking up what is already there, so adding more is useless.
What causes nutrient lockout? Well, there can be a number of things. Your pH is too high or too low (a little usually won’t hurt you unless the plant is extremely sensitive – but if you are extremely alkaline or acidic, you will see nutrient lockout as a result). There can be a chemical reaction between two nutrients which cause your plant not to uptake nutrients, and you can even have a buildup of salt in your soil. Also, if you are using amendments which have been sitting mixed for too long.
wilted leaves
Plant displaying signs of nutrient deficiency.
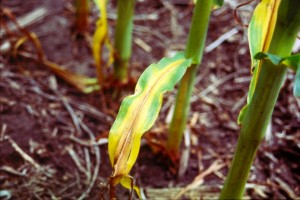
So how do you know if your plants are experiencing nutrient lockout? Well, you are going to see the same symptoms as a nutrient deficiency, because that’s basically what it is. Most often, you will notice because of foliage discoloration. Your leaves will be yellow, limp . . . the plant just kind of looks “sad”, for lack of a better description. They can also look scorched, and if so, this is most likely a salt buildup.
The best way you can get rid of nutrient lockout is to do a good flush of your soil, making sure to water with pure water for a few days. If you are growing hydroponically, do a full flush and start with pure water again. You need to also check the pH of your soil, as too high a pH is a pretty common cause of lockout. We have pH adjusting products available to help you with the results here.
So, in short, nutrient lockout isn’t terminal. It’s fixable, you just have to flush everything (the purpose of that, by the way, is to remove excess salts), adjust pH, and kind of start from scratch with the nutrients. Extreme Blendis a great nutrient for after a flush, as are our Kelp products.

Monday, September 23, 2013

When is the right time to pick my veggies and fruits?

If you are a beginning gardener, it can be so tricky to figure out when to pick your fruits and veggies. Picking them too early will mean you don’t get their full flavor. Picking too late can mean you let them rot right on the vine. There isn’t much worse than an overripe watermelon . . . ew. So, to get started – here is a list of some common veggies and fruits, and the best times to pick them.
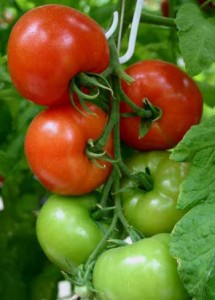
Tomatoes: Tomatoes are tricky. For your absolute best flavor, you want to pick them when they are a very deep color (whatever color you’ve chosen to grow), with no trace of green on the skin. However, if you live in a climate like, say, Idaho, where the nights get very cool, you can pick them once you see a blush of color and let them ripen indoors. Obviously, not in the fridge. Fridges are bad for tomatoes.
ripe tomatoes
Ripe tomatoes on the vine

Cucumbers: Cucumbers are actually pretty simple. As soon as they are a decent size, pick them. They will double in size overnight, too, so you have to check them pretty regularly. Also, if you let them get too large or sit too long, they will get slightly bitter and seedy, so don’t wait. A cucumber plant self-regulates how many cucumbers it will have on a plant at one time, so the more you pick them, the more you will get! Mother Earth News has a great article on cucumbers here, I highly recommend it.
Peppers: Peppers are fun. If you are growing bell peppers, let them grow and then start to turn colors. If you want a green pepper, pick them green. If you want yellow or red, wait until they turn that color, then pick them! Lol!
Bowl of peppers
Bowl of ripe peppers – yum!
Corn: Corn is ready when the ears are rounded at the base, and the fluffy stuff at the top is dark brown but not dry. You can also check the kernels if you peel them back and they look rounded and milky. Not much is better than sweet fresh garden corn.
Melons: Although, I think Melons might be a good contender for better than fresh corn. If not better, definitely equal. I found a great article on reneesgarden.com, with a breakdown of a TON of veggies and fruits and when to harvest them, (here is the article link) but here is what they had to say on melons: Cantaloupe: should be heavy and tan-colored (with a slightly yellowish tone). The cantaloupe’s netting will be slightly more raised than it was before, and it will be cracked around the stem. You will also be able to feel a softer skin toward the bottom, and they will be fragrant (I love the smell of cantaloupe). Also, they should come off the vine easily, but you don’t want them if they have already fallen off.
Watermelon: Watermelon become slightly dull, and the light patch at the bottom will change from light green to yellow when they are ready. The leaf on the tendril nearest the fruit will also turn brown and wither. The skin should be hard, as well.
Gardens are wonderful, and eating the fruits of your labor is such a wonderful experience. Learning when and how to harvest your garden is such an important part of growing one. Feel free to ask us any questions we didn’t answer, and make sure to check out the articles above! :)
Don’t forget to enhance your garden’s chances with Kelp, Extreme Blend, and our Grow and Bloom Packs!

Monday, September 16, 2013

What is Silica? Why should I use it?

Silica . . . ahhhhh, Silica. Well, technically, Silicon Dioxide, but still. Silica is an organic compound with a ridiculous amount of benefits for your plants. Silica increases the strength of cell walls, actually fortifying the cells from the inside out. Stronger cell walls are good, this means your plant will be able to support the weight of the flowers, fruit, and/or buds you’ll eventually see.

Silica also increases resistance to stress – due to both climate (helps plants withstand extreme temps, both high and low – which is great if you live somewhere with a big temperature variance between day and night) and drought. Silica protects your plants against drought in a really cool way – it actually forms a protective coating on an intracellular level, which decreases the amount of water loss through transpiration – this is great because your plants will be able to withstand a drought much longer than plants not treated with silica.

Silica increases resistance to pathogens, too, including powdery mildew. Now, if you’ve ever dealt with powdery mildew, you KNOW what a big deal that is!!! If you haven’t dealt much with powdery mildew, or just want to know more about it, check out the blog we wrote on it: here. Basically, the plants build up an additional mineral barrier, using the silica, which lines the cells and makes it more difficult for diseases and pathogens to penetrate the plant at all. Silica also helps the plant resist sucking bugs by accumulating in the outer walls of leaves – when used as a foliar spray, you’ll see good results.

Also, Silica increases the metabolic rate in your plants, and, just for fun, silica has been shown to increase chlorophyll concentrations. This is great, because your plants will be greener, and you also see less wilt to your leaves.

So . . . why can’t I just use Potassium Silicate for all those things? Well . . . you can. However, potassium silicate is not listed as an organic product, whereas Silicon Dioxide is. There are many of the same properties among both substances, but if you are looking for an organic way to increase cell strength, metabolism, and resistance to pathogens and environmental factors, then Silicon Dioxide (silica) is most definitely the way to go!
Silica

Silicon Dioxide (Silica)

So when is it good to use Silica? Should I use it in the grow cycle or the bloom cycle? That’s an excellent question – so far, we’ve seen benefits to Silica in every stage. So basically, from seed to fruition. Plants grown in soil tend to uptake trace amounts of silica from the soil, whereas if you are a hydroponic gardener, there is no silica in your growing medium unless you manually add it in!

Also, plants grown with silica tend to show less shock during root growth from transplanting, as well as the flowers having a longer shelf life than those grown without silica.

Silica