Sunday, June 30, 2013

Hugelkultur - wait, hugelwhat?

Nope – not a typo. It’s Hugelkultur. This is a way of gardening which fits right in with the organic, sustainable, use-what-you-have type of gardener! But what is it?
hugelkultur
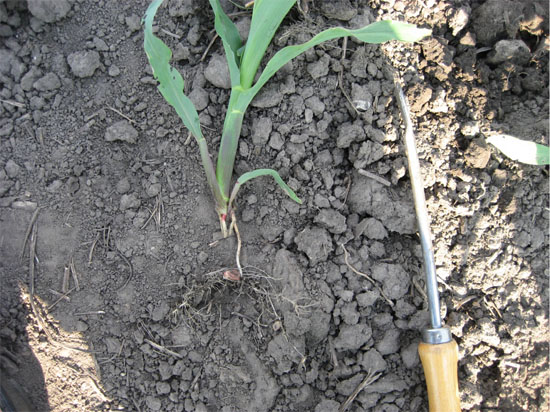
Hugelkultur is basically “mound culture”. Meaning you basically lay wood (avoid woods which release chemicals as they decay, such as cedar or walnut), compost, manure, and other rotting, plant-based materials, cover it with soil, and plant your crops. As the wood decays, you get some amazing aeration in your soil, negating the need for tilling (after the first year). There are several benefits to this method of gardening, including the natural composting of the wood.
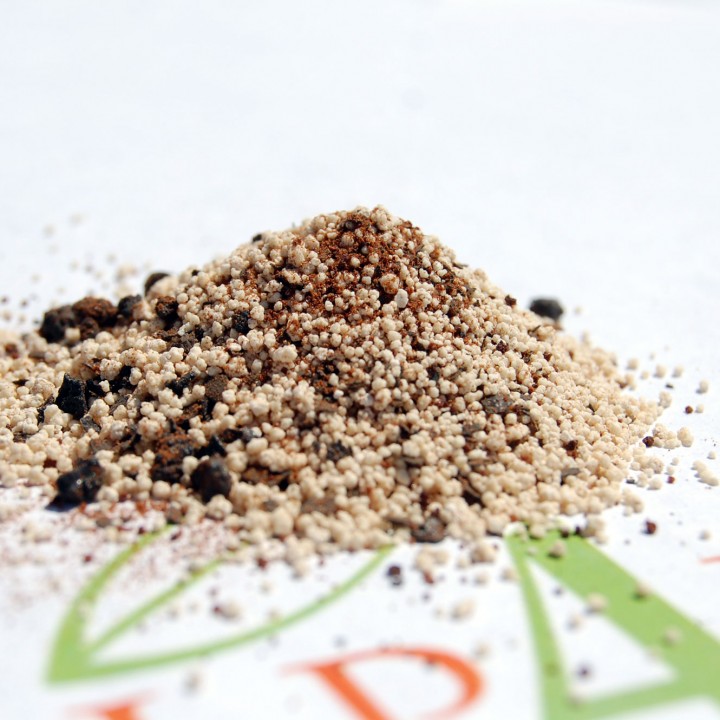
One important fact to remember is the composting of the wood will initially make your soil nitrogen-deficient, so you want to make sure the soil you lay down on top of the wood is very nitrogen-rich (or just add in our 30-10-10, available for only $9.95 for a pound).
Traditional Hugelkultur bed
hugelkultur3
Hugelkultur is a centuries-old method of farming, and is wonderful for colder-weather climates, because the composting action naturally keeps your soil a few degrees warmer than it would otherwise be. This enables you a slightly-longer growing season. It’s fairly sustainable, as you use natural materials around you as compost (the wood).
You can make your beds as tall as you like (even to the point they are as tall as you are), or you can dig down to create the compost bed, and then all you have for mounds is a slight raise, much like you would have in a regular garden.
Embedded Hugelkultur bed
hugelkultur2

Interesting way to garden, don’t you think? Have you ever experimented with a Hugelkultur bed? If so, send us your feedback!

Thursday, June 27, 2013

Why do my tomatoes get Blossom-end Rot? What can I do to fix it?

Why do my tomatoes get Blossom-end Rot and how can I stop it?

You’ve seen it. A gorgeous tomato: bright, colorful, round . . . until you look at the bottom. Leathery, brown, awful. This is the dreaded Blossom-end Rot .

Blossom-end Rot

blossom end rot
What causes it? How can you get rid of it? Well, surprisingly, blossom-end rot is not a disease. It’s actually caused by a calcium imbalance in your tomato. Blossom-end rot occurs not only in tomatoes, but also in squash, peppers, cucumbers, and melons. When you see blossom-end rot, you need to pick the fruit and get rid of it, because it will rot and infect the plant eventually.
So what can cause the calcium imbalance? Well, not having enough calcium in your soil, obviously, but there can be other factors too. If your watering patterns are too erratic – you let your soil get too moist and then too dry. Also, if the season starts out very wet and then ends very dry (changing while the fruit is setting, mainly).
Calcium deficiencies can appear if your pH is too high or too low. Tomatoes thrive in a pH of 6.0 – 6.8, so you want to maintain that balance. We have great products to help with pH, simply click the button for either pH Up or pH Down at the end of the blog.
So what can you do to prevent blossom-end rot? Well, first, stay consistent in your watering habits. Tomatoes are like kids – they do best when they have a routine.
For your soil, you can add our Granular Gypsum, which will release slowly over time. For more immediate results, or to help save an existing tomato harvest, you can add our Calcium and Magnesium or Organic Cal Mag. Another great fertilizer for your tomatoes is our 4-18-38 – it’s high in phosphorus, and low in nitrogen.

Tuesday, June 25, 2013

Soooooo, how can I tell if my plants are under-watered then?

So, we figured out how to tell if your plants are over-watered and how to fix it. But how can you tell if they are under-watered? And what can you do to fix that?
Feel your soil. About 1-2 inches down, you should feel some moisture with your finger. If the soil is dry, you need to water. If you can still feel moisture, you can wait a day. Also, when you water, try to get water mostly around the stem, not so much the leaves and blooms of your plant. Please remember, every plant species is just a little different, but these guidelines will go along with most anything.
Crispy Leaves. Crispy leaves are never good! A plant will conserve all the water it can by keeping it in the stem and letting the leaves die off. Whereas an over-watered plant will be yellow and limp, an under-watered plant will be yellow and crisp.
underwatered yellow leaves
Roots visible at the surface of the soil. The soil will be cracked and you will see glimpses of your roots right at the soil surface. If your roots are straining that hard for moisture, they aren’t getting enough.
dry_soil_plant

So what can you do if your plants aren’t getting enough water? Well, you want to make sure you are watering them more frequently, first of all. Then, of course, we have some products to help your plants uptake as much water as is possible!

Yucca Extract

Yucca Powder

Yucca spends its’ entire life searching for water. As a soil additive or as foliar spray, it’s amazing for helping your plant extract all available water from the soil. Starts at $9.71 for 4 ounces.

Humic Acid

Yucca-720x720
Humic Acid is another great soil additive. Humic will not only help your plant uptake water, but will help it resist the stresses of heat, drought, cold, and disease.  Only $7.95 for 8 ounces!

Kelp and Humic Blend

Humic-350x350
Great news – we also carry a Kelp and Humic blend! Only $11.85 for 8 ounces!

Extreme Blend

Granular-extreme-close-up-720x720

Extreme Blend – This is going by far the best product to help your plants intake all the nutrients they’ve been missing out on due to under-watering. Extreme blend includes Soluble Humic Acid (improves the plant health, aids in water uptake), Fulvic Acid (helps water and nutrients permeate the plant), Kelp and Amino Acids! Wait for it . . . $15.50 per POUND. Yup. Just sayin’.

Thursday, June 20, 2013

Lazy Man’s Compost

For some people it may be hard to keep a compost going. Following a few the 5 easy steps from Kelp4less, we will show you how to make it fun and easy to keep a compost box and provide a ready to use fertilizer instead of trashing it in a landfill. In our climate this is the easiest composting process. We call it the “Lazy Man’s Compost”.

Step 1:
Decide where it belongs. Keep it in a low traffic area. Away from your house, on the corner of your lot or garden area works great.
Step 2:
Dig into the dirt and break up the soil to allow for easier breakdown of the waste you will add later. Add cardboard (small pieces), leaves, grass, banana peels, food scraps, egg shells, egg cartons (remember cardboard), coffee grounds. Make sure not to put any meat products. This will attract pests and rodents. We will try to fix this problem in step 4…
Step3:
Add any soil amendments such as KelpHumicKelp MealAlfalfa MealOyster Shell FlourBat Guano orAmino Acids. Now is a great time to give food and nutrients to the biology that is doing all your dirty work. Feed them well and they will always treat you right!!
Step 4:
Stake out the area. Set up chicken wire, plastic fencing, or anything to keep the pests away/out of your compost.
Step 5:
Keep adding all the ingredient above and make sure to stir at least 1-2 times a week for best compost breakdown.

Worms are great and do most of the work for you. Seeing this is an excellent find.
worms

Know your pH – Now with pH Powders

The pH value is very important in determining whether or not a substance is acidic, alkaline, or neutral. This will determine if the plant can gain access to the nutrients. The pH of a substance is measured on a number scale of 1 through 14. When your pH is higher than 7.0, it is considered to be basic, also called alkaline or base. When your pH is less than 7.0, it is known as acidic, also called acid.
Your pH level can be very important when growing plants. When a plant's soil or nutrient solution becomes too basic, the nutrients become unavailable to be absorbed by the roots. A lot of growers think that if they add more nutrients or fertilizers, this will help. What it actually will do is compound the problem by usually causing toxic salt build-up. Toxic salt build up will stop the roots from absorbing water. You will want to check your pH levels before adding more nutrients and fertilizers.
Steps for pH:
Add your nutrients and fertilizers that you normally use before adjusting the pH.
Check the pH level using your method of pH testing.
If your pH level is too low, add a teaspoon of pH UP. http://www.kelp4less.com/shop/ph-up/
If your pH level is too high, add a teaspoon of pH DOWN. http://www.kelp4less.com/shop/ph-down/
Test your pH levels again using your test kit. Repeat if necessary until you reach your desired pH.

pH Powders

How to Brew Compost Tea

Many have heard of the benefits of Compost Tea. You know it works, but why and how? We want to shed some light on this subject. Explaining a few key elements to brewing a good Compost Tea.
The largest factor in the quality of your Compost Tea is of course, your Compost. Where did it come from? How was processed? Great Compost should smell sweet, earthly and rich. Compost is a great tool if used properly. Although it’s pretty hard to mess it up. Compost is full of nutrients, vitamins and minerals and when mixed with aerated water, active biology.

Compost Tea Starter

Compost Tea Starter
This Compost Tea Starter has added Mycorrhizae, Kelp, Humic Acids, Amino Acids and Fulvic Acids. A great combination of organic acids and beneficial bacteria.  The concept is to soak the compost is water. For best results, you should provide aeration. Allowing the microorganisms to thrive and grow. Creating the environment for this bacteria to develop will make for easy processing of the “locked-up” nutrients.
Nutrients are there in your soil, the plant simply can’t gain access them. The  microorganisms  in the Compost Tea will break down all the nutrients and allow the plant to now gain access.

Water Prep

When preparing your water, if you are using tap water, let is sit in the sun for 24-36 hours. This will help de-chlorinate the water. A 5 Gallon bucket of water Adding aeration to this water will drop your wait time from 24-36 hours to 12-18 hours. I let my water bubble away empty for 1-2 days before using it. Continually cycling air into the water will help establish a proper environment for the micro-biology to grow.

Super Soaker

Grab a small burlap sack, sand bag, old sock and my personal favorite, panty hose. Fill up the sack with your Compost or our Compost Tea Starter. If you have earth worm castings they are another great addition to this micro biology we are trying to create. When your sack is full, find a way to seal it. Tie it together, or seal it in any way of your liking.
Toss in the Compost “sock?”. You can suspend the Compost to allow for better aeration, which in turn creates that ideal environment for these microorganisms to flourish.

Good Things Take Time

Average brew time can vary based on personal preference, but we like to brew for a minimum of 24 hours. Take 48-72 hours and you will see and taste the difference in your fruit or flowers. Foaming is normal, especially if you are adding some Kelp4less nutrients. Let this brew bubble away and next we will talk about application rates.
Compost-Tea

Time to Apply

Compost makes a great product to feed your plants as it is so flexible in it’s application. You are able to root drench you plants, foliar spray to leaves (just make sure filter or screen the solution before spraying), dilute it down with water and feed many, many plants in your garden or flower bed. 5 Gallons of this Compost Tea can be diluted to make 25 Gallons of ready to use feeding water.
Feed this brew once a week and water with regular water in between feedings. This is great for Flowers, Vegetable Plants, Trees, Shrubs and even back into your Compost Pile to complete the natural cycle.

Advanced Tips and Tricks

Here are a few tips and tricks that will make all the difference in your Compost Tea Brews.
  • Start with Warm Water – This makes a huge difference in the end result(active biology). Do you think the small microorganisms want to live in cold water?
  • Inoculate your Compost Tea with Mycorrhizae to stimulate micro-biological growth. A.K.A – growing your nutrient break down army.
  • Don’t add Molasses until the end of the brew. Only allow your Molasses to brew for 30 min – 1 hour. You can promote bad pathogens due to the high sugar content of Molasses. if you are not careful.
  • Do not waste this. All the sludge on the side of your bucket, or bottle, all the remaining sludge left over, this still makes great fertilizer. Just Add Water and apply it again.

Mycorrhizae and Root Development

Some common products out there for root development and Mycorrhizae. There are a few key factors to determine the quality and effectiveness of your Mycorrhizae product. Watching for these slight signs will make all the difference in your root system over the life of your plant. Get some in-active, old or otherwise worthless Mycorrhizae and your grow will suffer. Kelp4less wouldn’t do that to you, no need for your grow to suffer. Follow these steps to ensure success.

Know the Difference

Bacteria. Bacteria are vital for recycling nutrientsBacteria can be recognized by their shape and motion. Bacteria are mostly round or rod shape. Some filamentous bacteria are required for the growth of some plants while they are quite detrimental to the growth of other plants.
Fungi. A fungal hyphae can be distinguished by its strand-like appearance with straight cross walls. A hyphae should be uniform in diameter, and not less than 2 micrometers thick. The best hyphae in our soil are those that are wide in diameter and dark in color. (Generally, when speaking of soil health, dark is always good.) These wonderful networks of the soil food web help to hold and transfer nutrients directly to plants through symbiotic relationships. They also promote healthy soil aggregation.

Don’t Buy Water

  1. Any Mycorrhizae or Trichoderma product containing water is a stabilize liquid. This is required so the container doesn’t go anaerobic or explode on a retail store’s shelf.
  2. This stabilization process seizes all the micro-biology growth, which defeats the entire purpose of feeding Mycorrhizae.
Examples of watered down products:

Voodoo Juice – Advanced Nutrients

voodoo_juice_derivitivesvoodoo_juice
Did you see that bottom line on the back label of Voodoo Juice? 98% Water? I didn’t know water was so expensive? Can’t you get a gallon of this “water” at any local convenience store for less than $3? Where is this other price coming from? Ohh yeah – product labeling, fancy graphics, and the sales and marketing team they design to hide this obvious fact that they are selling you water. But not only water, a stabilized, therefor “dead”, mycorrhizae product which is 98% water and 2% actual product.

Moving on to powders

Many products on the market are powder or granular Mycorrhizae products. Understand most (maybe 98%) of all mycorrhizae products come from the same source. Nothing is special between one brand and another. There are a few things to watch for to get the right stuff.
  1. Freshness – this is key. An old batch is not as potent as a new batch
  2. This product only stores for 12 months. After this time, you loose most microbial value.
  3. There are 4 main strains to watch for…Rhizopagon (ECTO), Glomus (ENDO), Trichoderma and Bacillus (bacteria). Some may mix and match but understand it’s all the same strains being used repeatedly. Maybe some have more or less bacillus sub-strains but you still ultimately have the Bacillus, Glomus or Trichoderma. There are many, many other strains of fungi and bacteria, but the plant and plant nutrients industry really only works with these 3 main strains.

Don’t Buy Blends

Products you have probably seen or used:

ZHO Root Inoculant – Bontanicare

Zho Bag
ZHO Root Inoculant  contains 49% inert ingredients. Meaning 1/2 of what you are buying is useless, of no value, waste of money. Do not buy blended products.

Great White – Plant Success

Great White
Great White is a superb product. Works great, just is not cost effective. Not blended with anything that is not needed (which is good). Just the Bacteria and Fungi Strains. Want a cheaper solution? Our Myco + Trichoderma blend is a perfect substitute that will also save you some money.
This educational post is for that intent only. Education. Don’t be afraid to read the back of the label of all the products you use now and do some research.

Purchase our Mycorrhizae here: http://www.kelp4less.com/product-category/mycorrhizae/